
In DataFeedWatch, you can categorize your products:
How to assign category by Auto-Categorization
Auto-categorization lets you assign the most suitable and detailed categories according to Google's taxonomy.
-
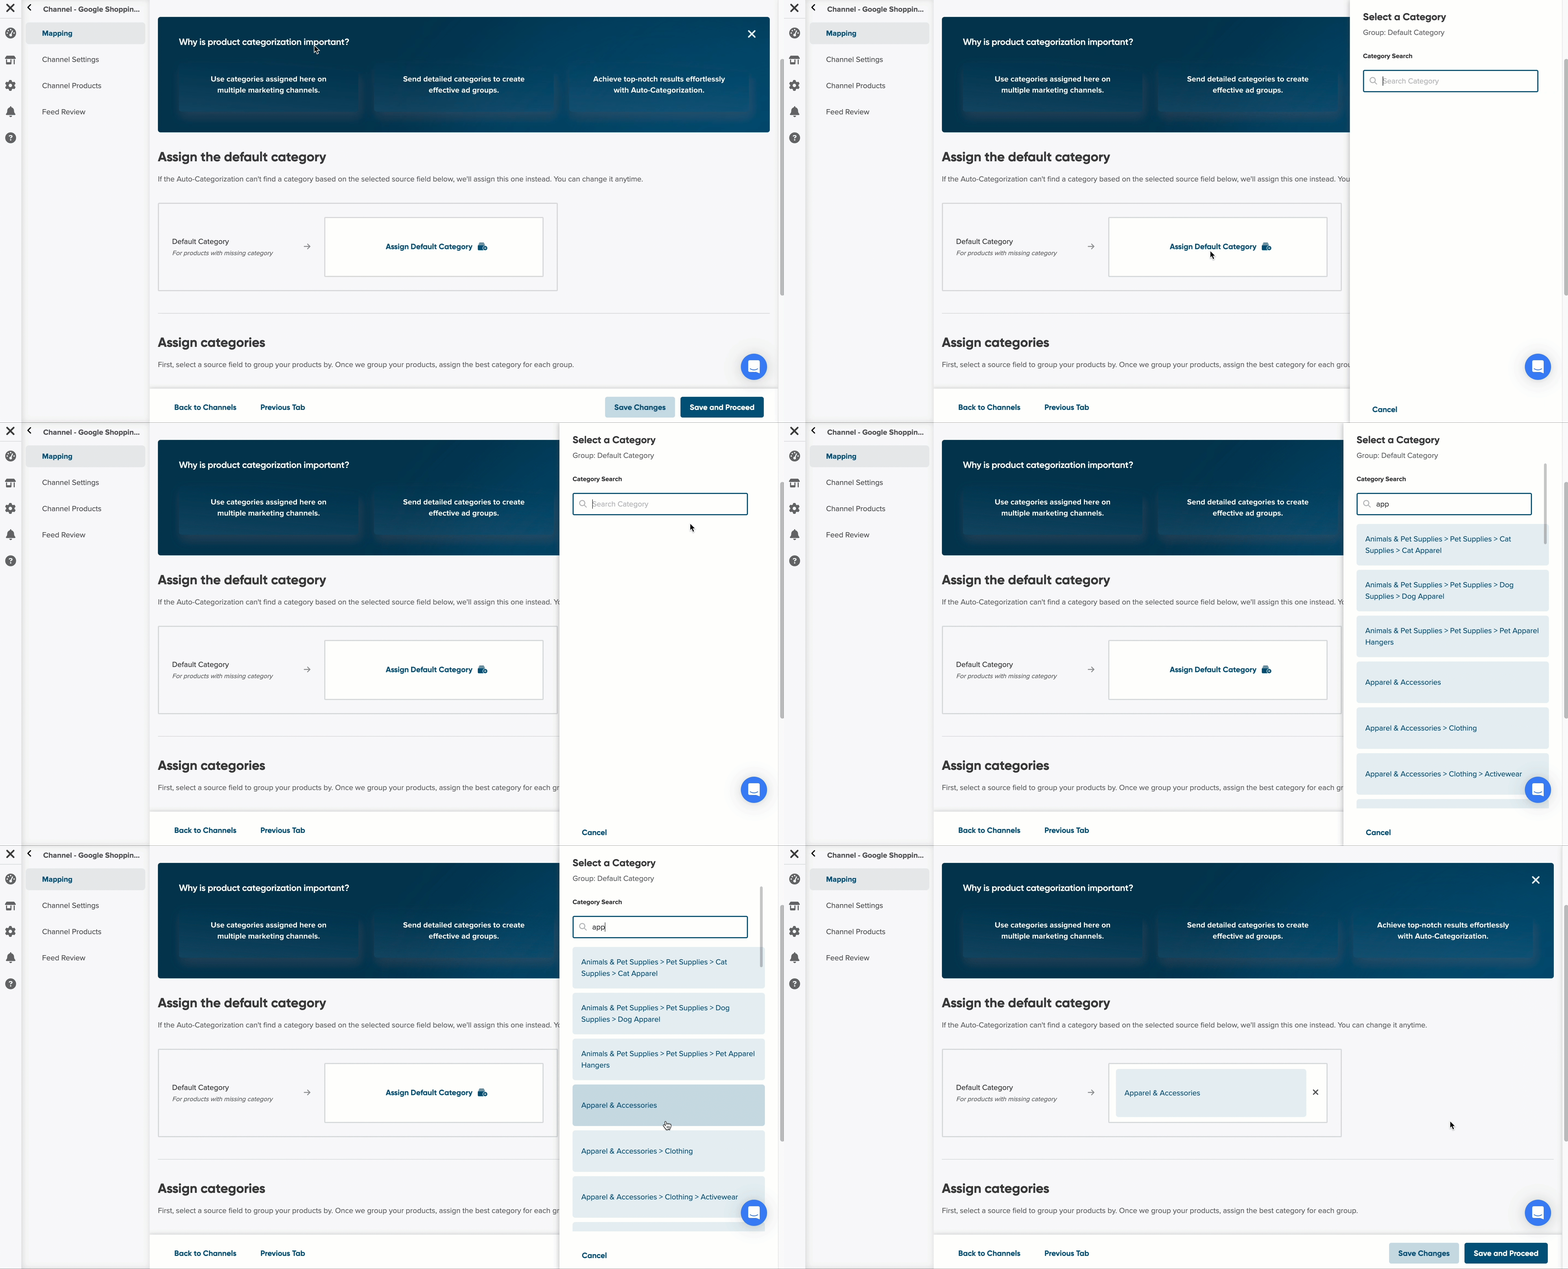
First, you need to assign the default category. You can select the one that best describes your entire product group. For example, if you sell skirts, select Apparel & Accessories.
If our Auto-categorization doesn't find any category, we'll assign this one automatically as the default category.
Please note: When you set up your categories for the first time, all the products may be assigned a category.
However, this may change at the next download. For example, when you add more products to your source feed, these products will be categorized according to the setting on the Categorize Products page.
Selecting the default category ensures that the products are in the correct category.
2. Select the product type as the source field that lets us break down your products into smaller groups.
What is product type?
A product type is a classification of products that share common characteristics, for example:
Iphone, Samsung Galaxy, Xiaomi Redmi → Product type: Smartphones
You can choose another source field if needed, but we recommend choosing the product type to provide the best results when assigning categories.
3. To assign a category, click on the box Assign Category.
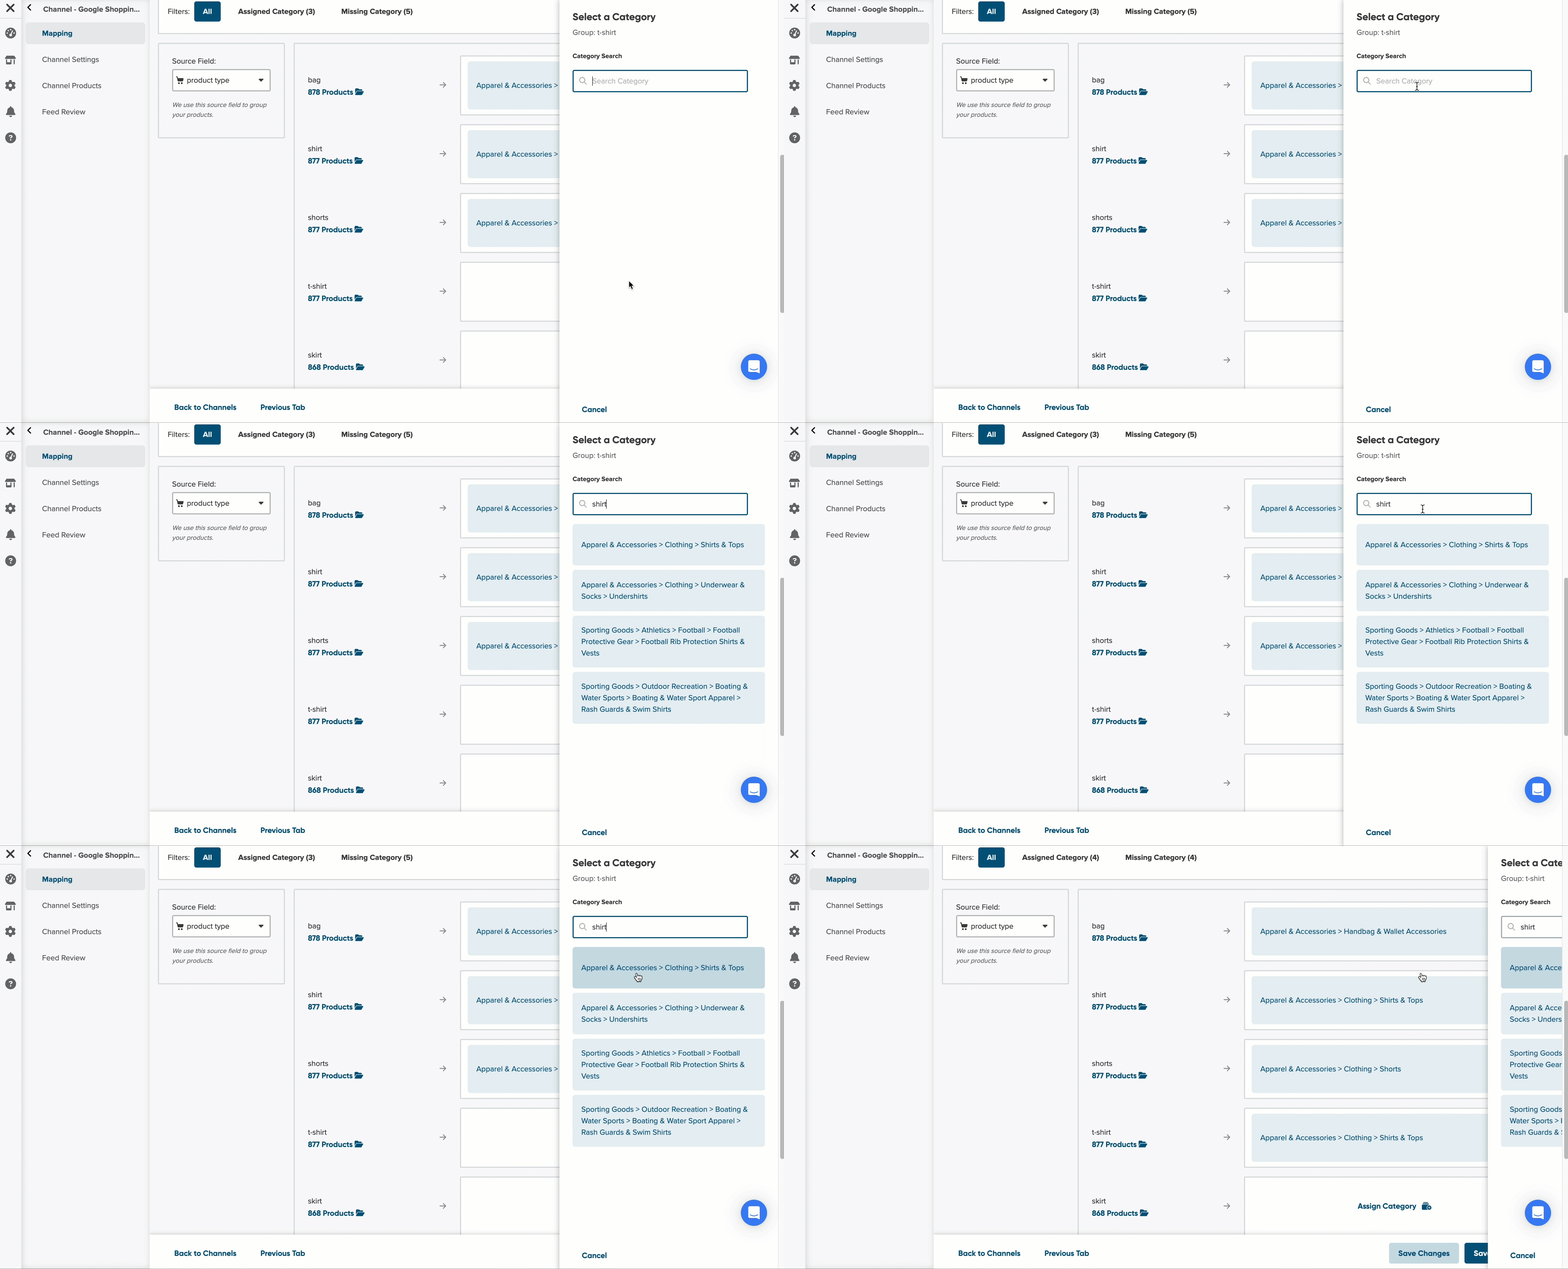
4. When the sidebar slides out, look for the most suitable category for the group.
5. Select the category.
6. Click Save and Proceed.
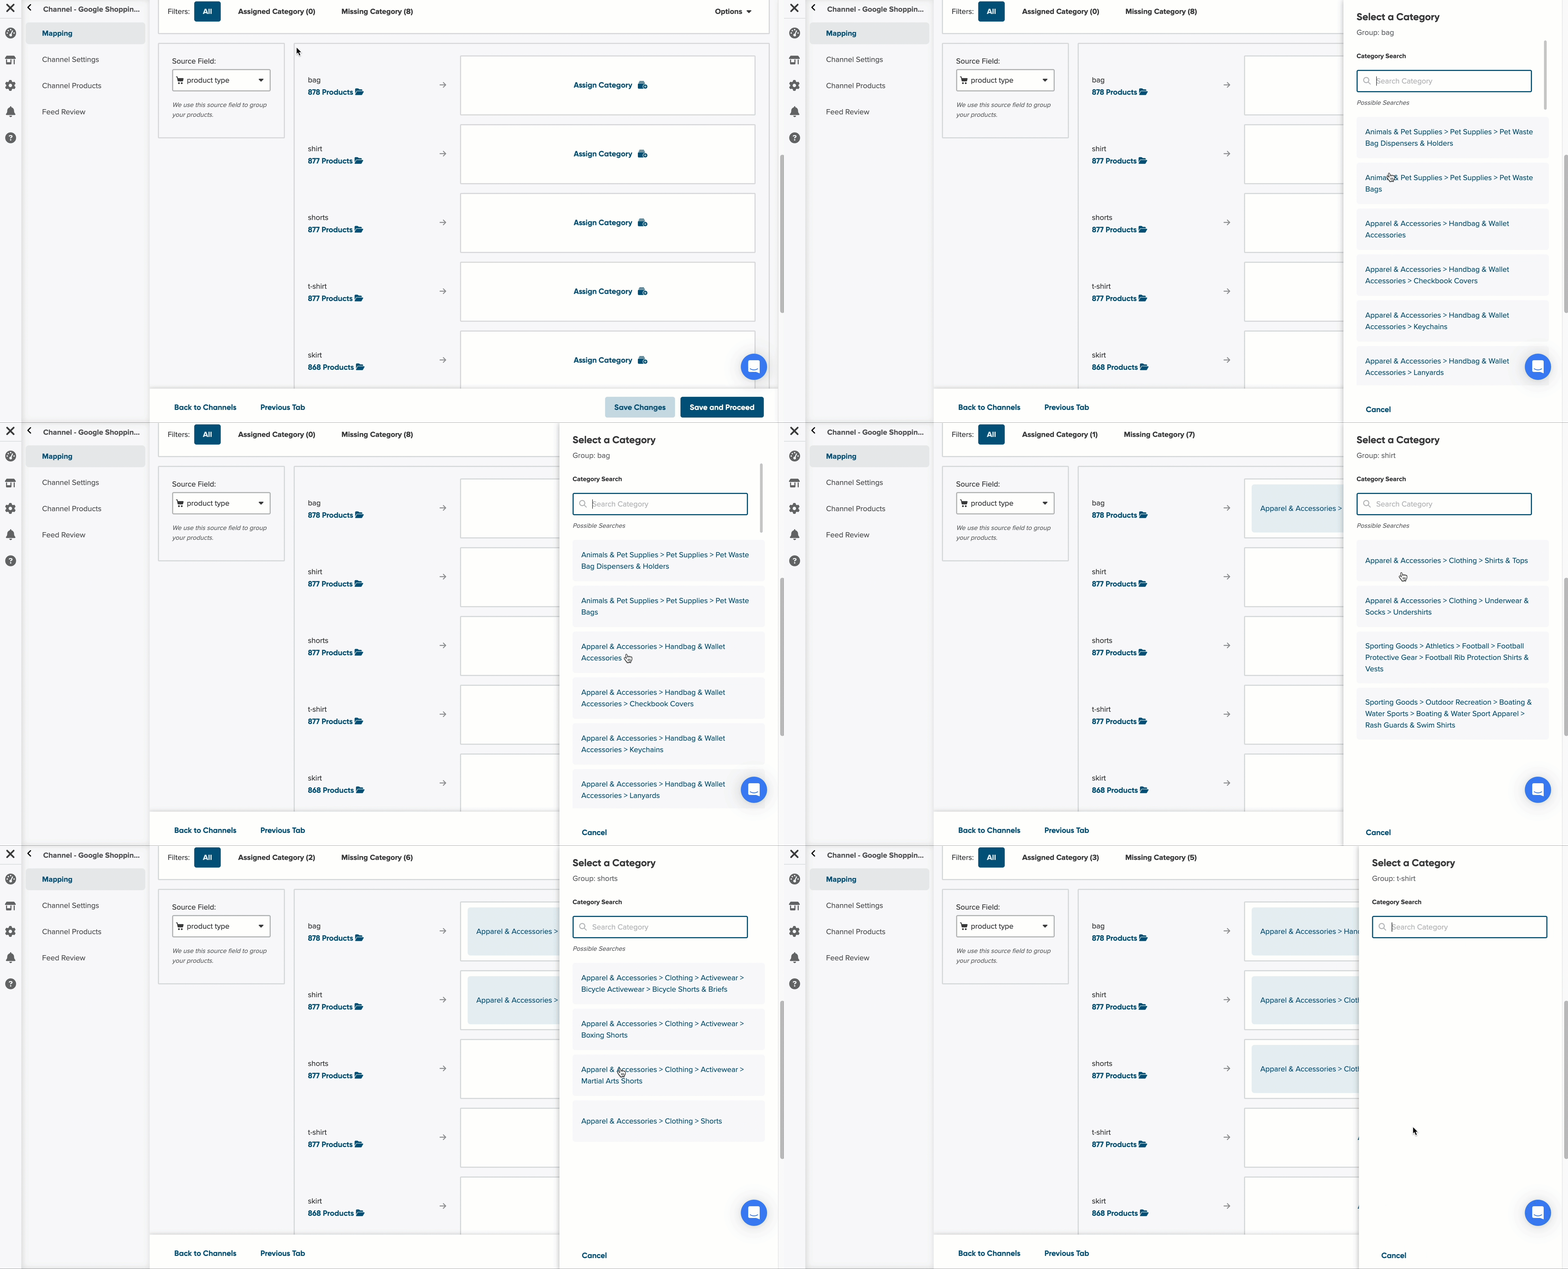
If you see too many categories, you can use a search bar to find the one you want.
How to assign categories manually
💡 Manual Categorization lets you:
- Assign all categories according to your preferences
- You can also use both categorization options. By setting the rules manually, you can assign the categorization you want to the specific products.
Auto-categorization will take these conditions into account and add them to its algorithm.
On the Assign Categories page, click the tab Manual Categorization.
-
Click the Add Category button.
-
Click on the first field below the categories and look for the category you want to assign.
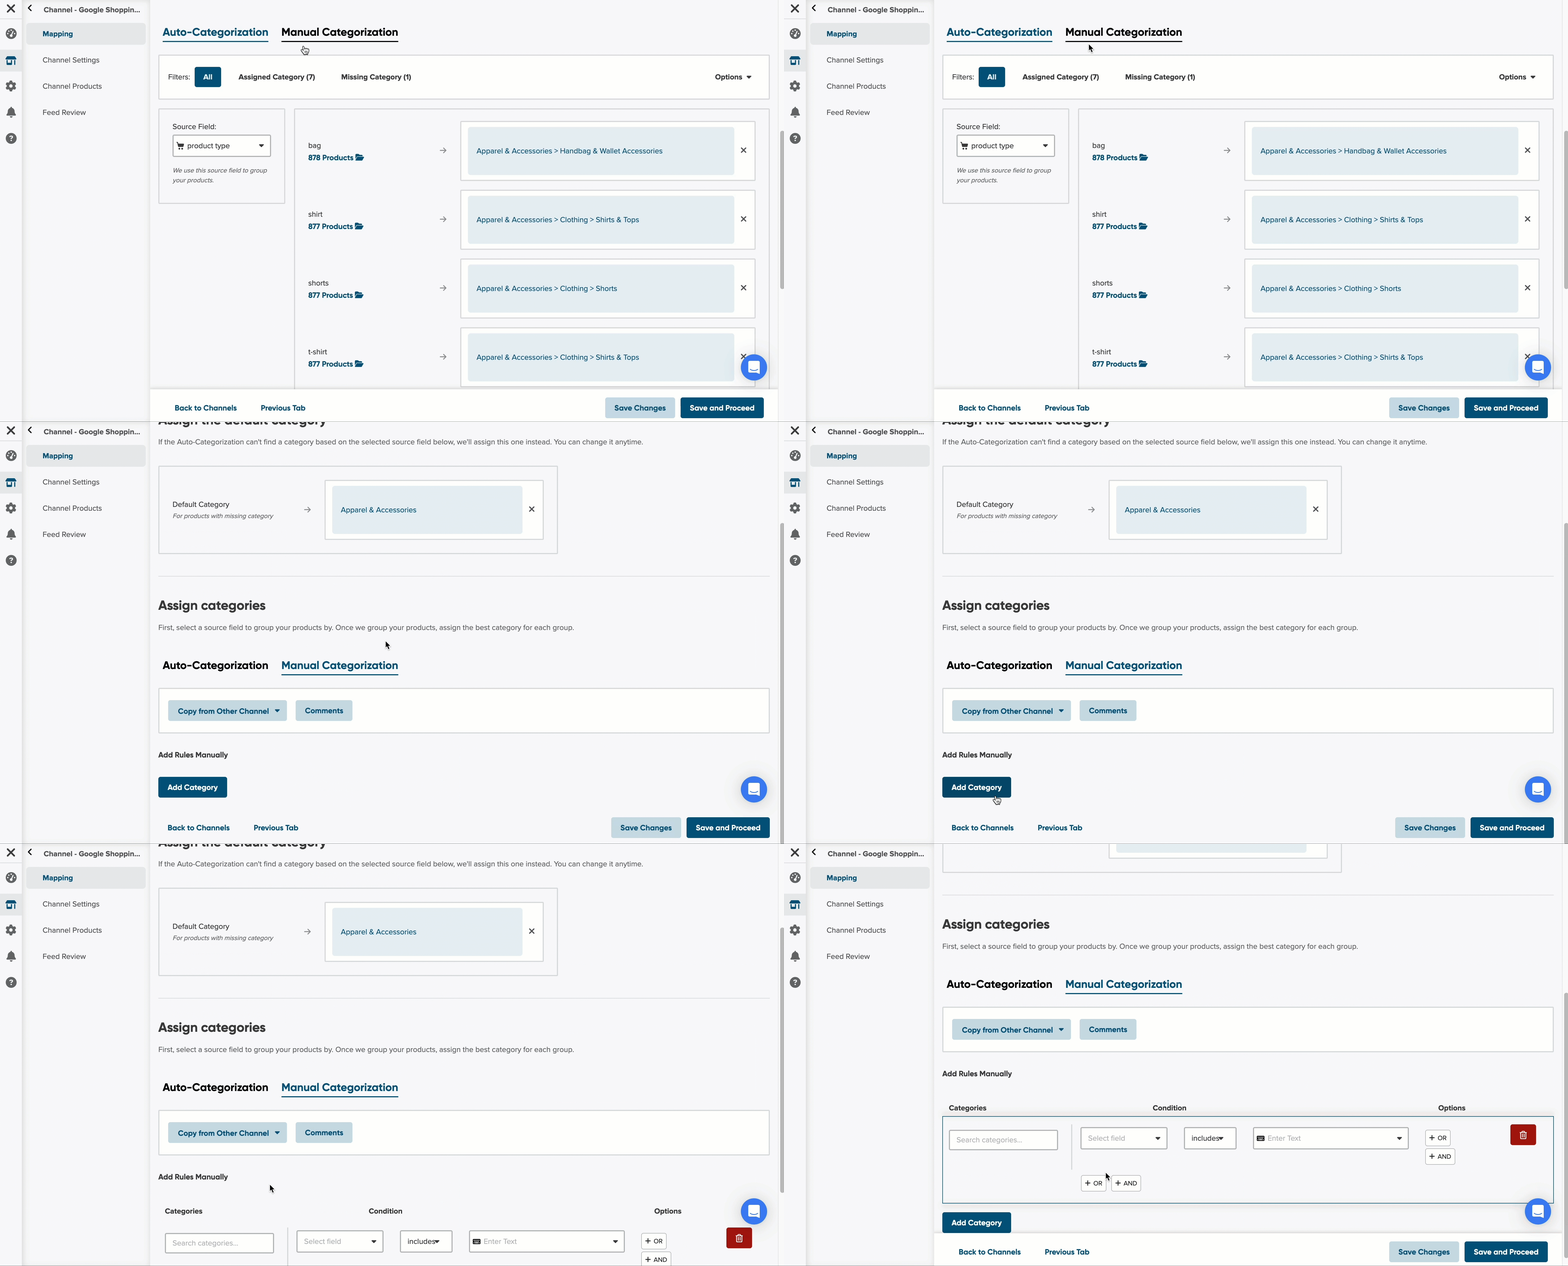
3. Click the drop-down to select the field you want to fetch the data from.
4. In the next drop-down list, select the relevant condition that will be useful (e.g. includes).
5. In the next field, enter the text relevant for categorization.
6. Click Save and Proceed.
💡To make it more straightforward, take a look at the example:
Let’s assume that you’re happy with the auto-categorization results. Still, you want to be sure that all the Prada Skirts you sell have been assigned the category Apparel & Accessories> Clothing>Skirts.
To do so:
- Go to Manual Categorization.
- Click the button Add Category.
- Click on the first field below the Categories, and look for Apparel & Accessories> Clothing>Skirts.
- To define the product Prada Skirt:
First, let’s define Skirt:
1. Click on the drop-down and select the product type field.
2. Next, select includes.
3. In the last field, enter the text: skirt.
.gif)
Done! Let’s go with Prada.
- Click on the +AND button.
- Since Prada is a brand, select the field brand.
- Next, select includes.
- In the last field, enter the text: Prada.
- Click Save and Proceed.
.gif?width=688&height=370&name=add_categoriation_manually_prada_example%20(2).gif)
.gif?hsLang=en)
Why categorize products?
- Your products are displayed to the right audience. They will appear in relevant search queries and answer the buyers' most suitable search intent.
- Aim high! Well-categorized products are more likely to rank higher in search results, attracting more clicks.
- More straightforward navigation for buyers: Categories make it easier for users to navigate and find the products they seek.
- And more!