How to get started?
This article shows how to register, add your first shop and channel, and map your feed to be ready to use DataFeedWatch as your feed marketing optimization tool.
Step 2 Add a shop in DataFeedWatch.
Step 5: Include/Exclude Products (Optional)
Step 6 Categorize Products (Optional)
Step 7: We’re checking your products.
Step 8: Check the channel products
Step 9: Look into Your Feed Review
Step 10: Export your products to the channel
Let’s dive in!
Step 1: Create Your Account
To start with DataFeedWatch:
- Visit our website.
- Click the button Start my 15-day free trial or see pricing directly.
💡 To match your business to the offer faster, pay attention to:
- Number of shops that you want to manage.
- Number of channels for account (number of feeds).
3. Select the plan that best suits your needs and business profile.
💡 If you’re unsure what plan is the best for your business, book a demo call.
One of our experts will show you how Datafeedwatch can energize your business and help you choose the plan that best suits your needs.
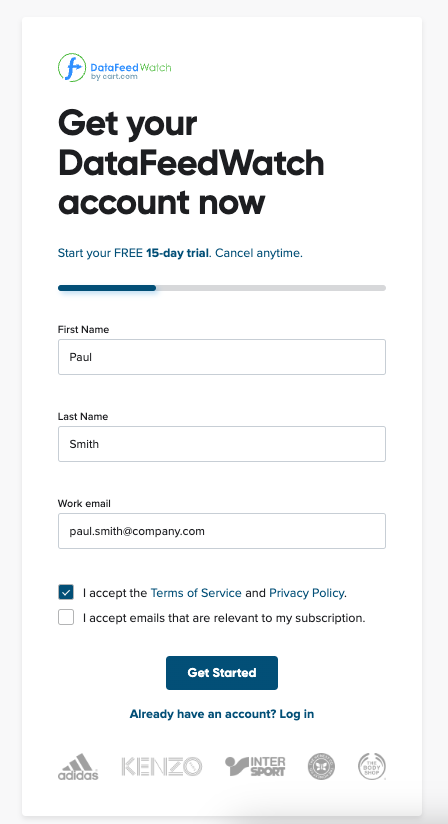
4. Introduce your data and get familiar with the terms of Service and Privacy policy to accept them.
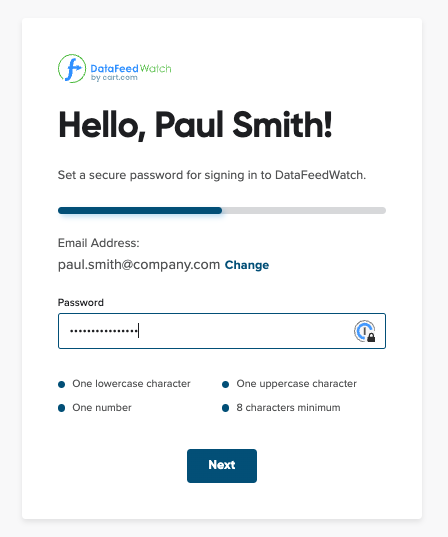
5. Create your password, and click Next.
6. Provide your phone number.
7. Proceed to checkout.
8. We’ll redirect you to Stripe checkout, requesting your payment method information.
No worries, we won’t charge you right away. According to your subscription offer, we’ll charge you after your 15-day free trial ends.
9. You’re ready to add your first shop! 💪
Step 2: Add a shop in DataFeedWatch
-
Log into your DataFeedWatch account using your credentials.
-
You’re on the Shop List.
-
Click Add Shop to start.
-
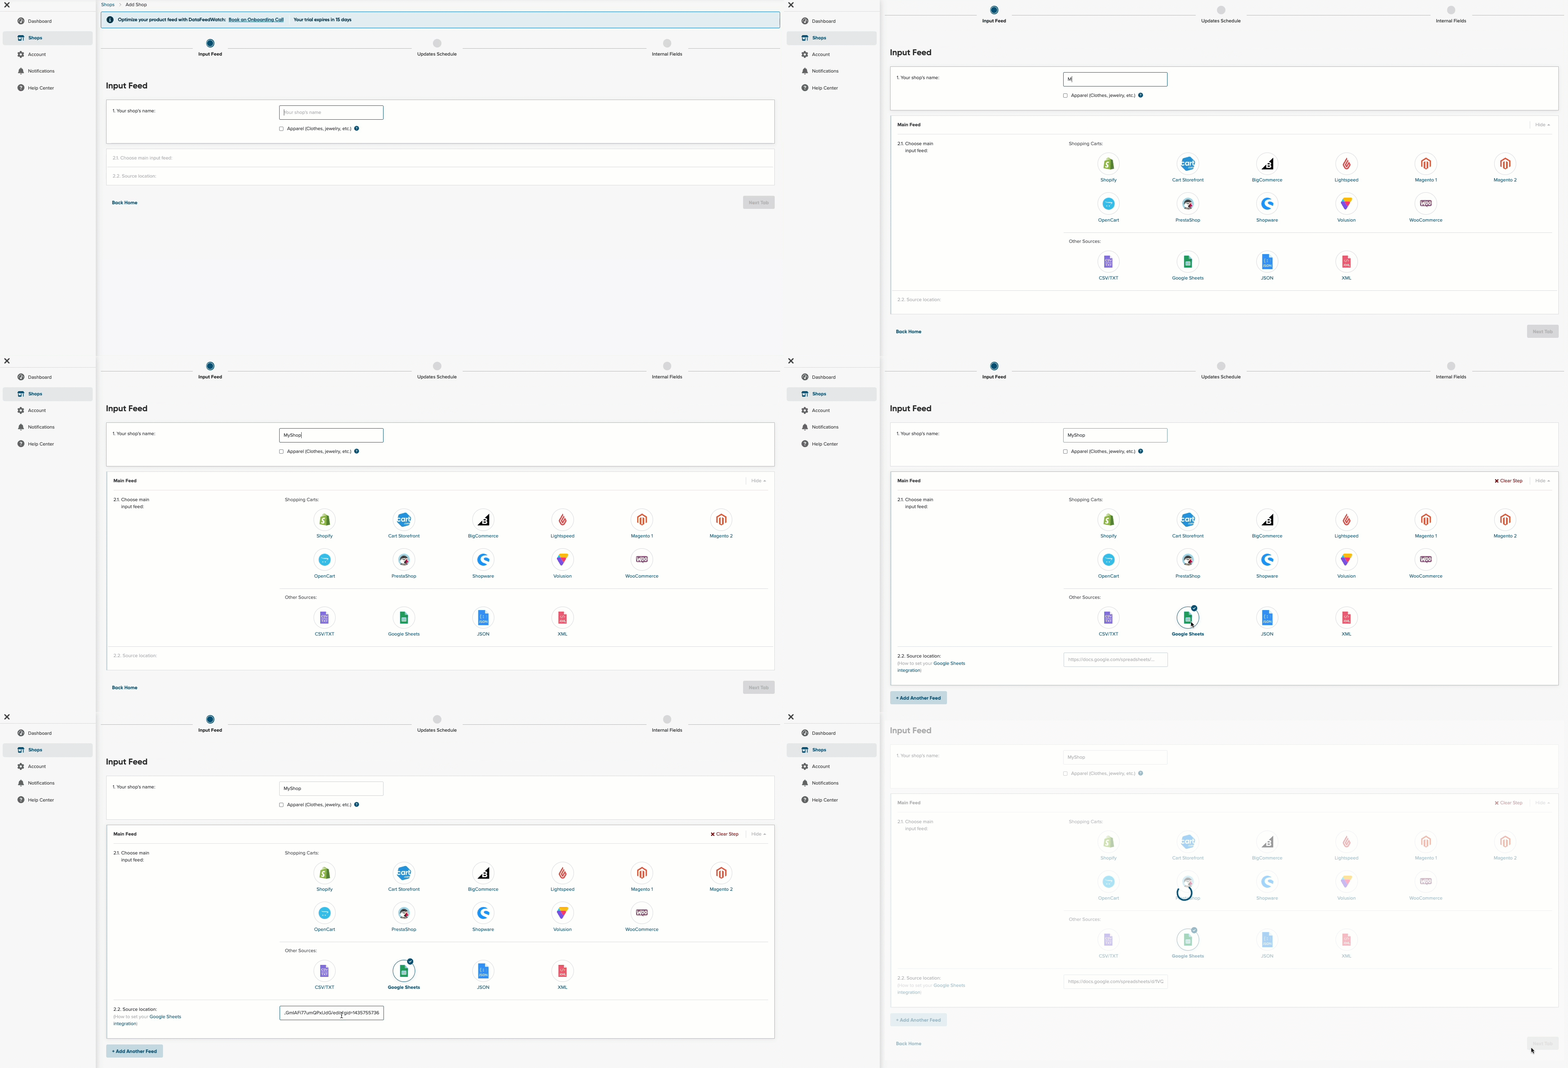
Insert your shop’s name.
If you sell apparel, check the box below the input field. We will automatically adjust the mapping to the best strategy for such products.
5. Choose the main input feed.
The input feed, or source feed, is a source from which we will upload the information about your products to map them later and adjust them to other channels.
a. With DataFeedWatch, you can integrate:
- The shopping cart you have your shops built on.
Each shopping cart may have a different way of integrating.
Visit our articles about shopping carts and check how to add your own:
- Or a file (we support CSV, Google Sheets, JSON, and XML formats).
💡 Check out Adding Product Files (CSV/TXT, XML, JSON)
6. Next, provide your source location.
If you’ve selected the file, remember to give access to the file so anyone with the link can view it.
💡 You can merge input feeds to create one big master feed. We explain how to do it step by step in Merging Two Different Source Feeds into One.
7. Click Next Tab.
8. Update Schedule: Decide how often and when you want us to update your product data.
-
- Choose your time zone.
- Select between one and five times when we update your data.
If you add more than one update, remember to keep 1-hour break between them.
c. If you want us to email you when the number of your product unexpectedly drops, select the Product Drop Protection option. (It’s optional).
💡 Read more in our How does Products Drop Protection work?
.gif?hsLang=en)
9. Create your master fields.
Master fields are your shop's library of rules. Create universal fields for your shop, like Title or Color.
Then, use them in all your channels. We have suggested some setups by default. You can follow them or choose any other fields you.
💡 Read more about Master Fields (Library).
10. Once you finish, click Finish.
Step 3: Add a channel
-
Select the country.
-
Select the channel (platform) that you want to advertise on.
-
Provide any details we ask for the given channel.
If you want to add the channel via an SFTP connection, provide your credentials.
💡Check out the article Uploading Data Feeds to Google Shopping (FTP) to learn more.
4. Click Add channel.
.gif)
Step 4: Map the fields to create your feed
Map all the fields required by your target channel. Most fields will be pre-configured, or you will not have to choose all the details.
You can choose Input Fields directly from your shop or copy the Master Fields rules using the Rename option.
To map a rule:
- You can see the field required for a chosen channel on the left.
- In the following drop-down field, choose the mapping type that indicates the tool and how it should use the data from your input feed.
- Then, enter the data requested in the field.

What is Mapping?
Mapping allows our tool to translate the product attributes you’ve imported into your input feed into those required by the channel.
The mapping also allows you to choose whether to copy them 1:1 without any changes (Rename) or adjust them using various other options.
To check the Mapping Type available in DataFeedWatch, please refer to Mapping Types Overview.
💡Lean more about mapping in About Mapping.
Step 5: Include/Exclude Products (Optional)
At this stage, you can easily include the products from your feed that you want to add or exclude the ones you don’t want to display now without changing the source feed.
It’s instrumental when you sell seasonal products.
💡 To learn more about excluding, check out the Help Article Choosing the Advertised Products (Include/Exclude Products Tab).
💡 Also, visit our blog to find out about:
Once you set your rules to exclude or include the products, click Save and Proceed.
Step 6: Categorize Products (Optional)
The taxonomy is crucial for product ads as it helps Google to identify if the products in a given feed are a good match for a given shopper query. Product categorization used to be exclusively a merchant’s errand and oftentimes a cumbersome one.
Categorize Products tab allows users to assign categories with ease. You don’t have to give categories to all your products one by one in your source feed, but you can create the rules that will categorize them automatically.
💡 You can learn how it works in the article Adding Categories (Categorize Products Tab).
💡 Also, if you want to learn more about the categorization, visit our blog, Google Product Category: How to get it right without going crazy?
Once you set your rules to categorize the products, click Save and Proceed.
Step 7: We’re checking your products.
When you’ve finished, we review all your products to find potential problems. It lets you avoid sending defective feed to the channel and look for the error in mapping. Rest assured, all the set-up you’ve been working on is saved.
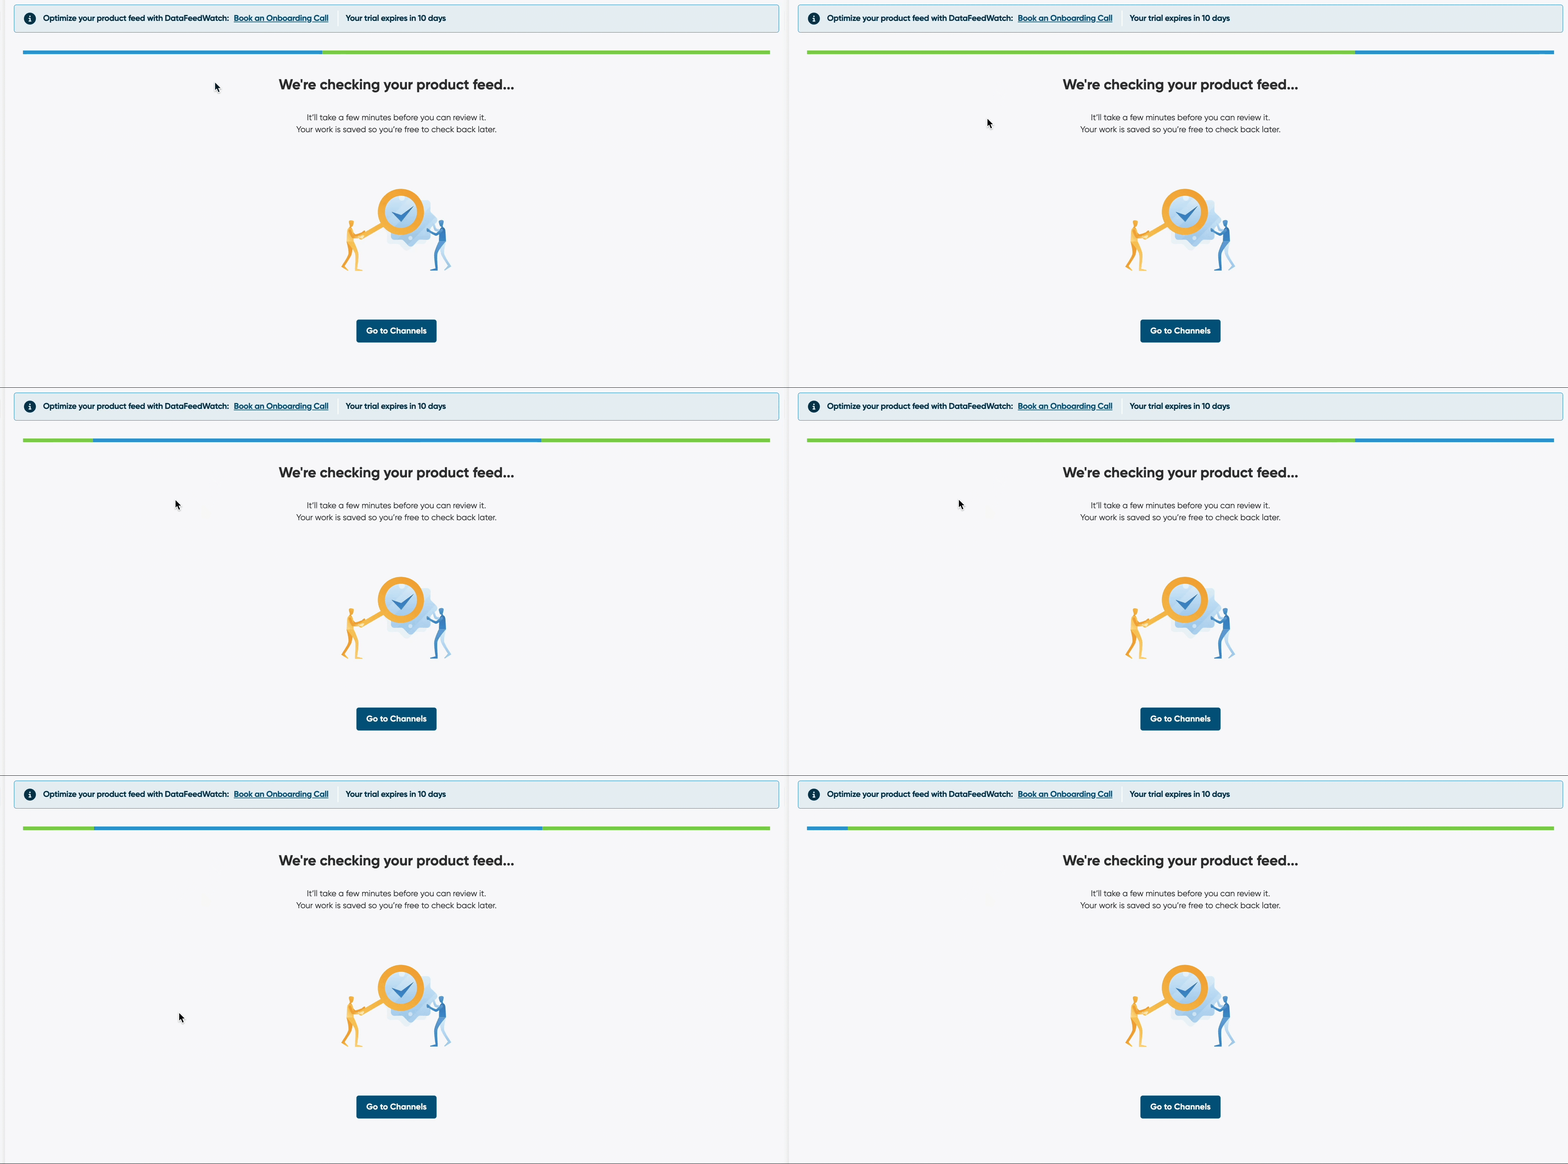
As a result, we’ll show you a detailed Feed Review.
Step 8: Check your Channel Products
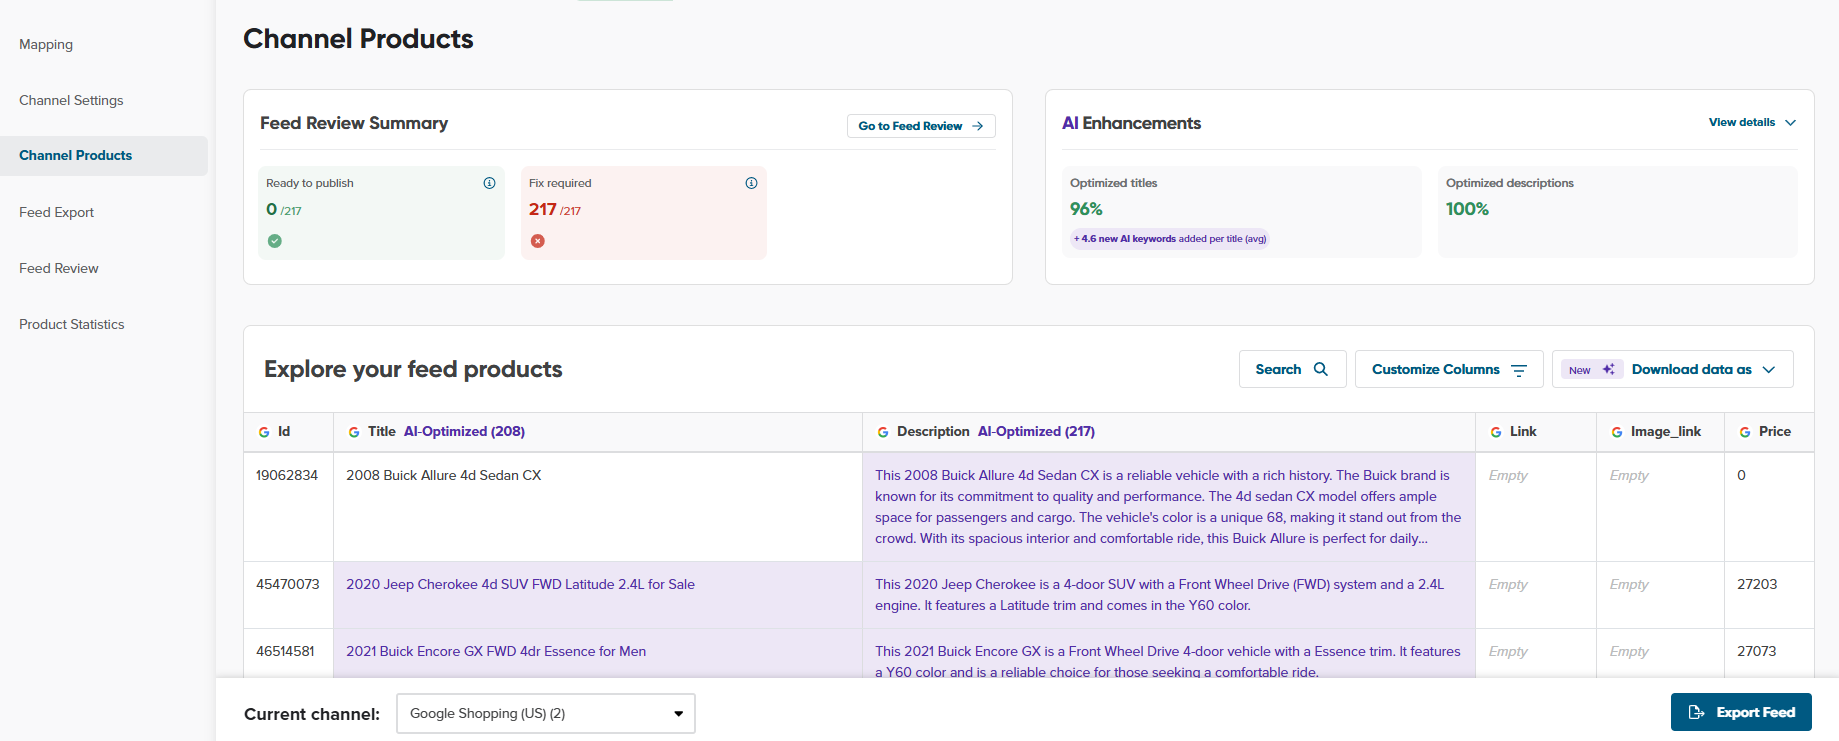
Once you have completed mapping your data feed, you can review it to see how your data will appear in your product feed within Channel Products.
This review allows you to confirm that all information is correctly mapped and displayed as expected.
If you notice any discrepancies or errors, you can go back and make the necessary adjustments to ensure your product feed is accurate and complete before finalizing.
Step 9: Check your Feed Review
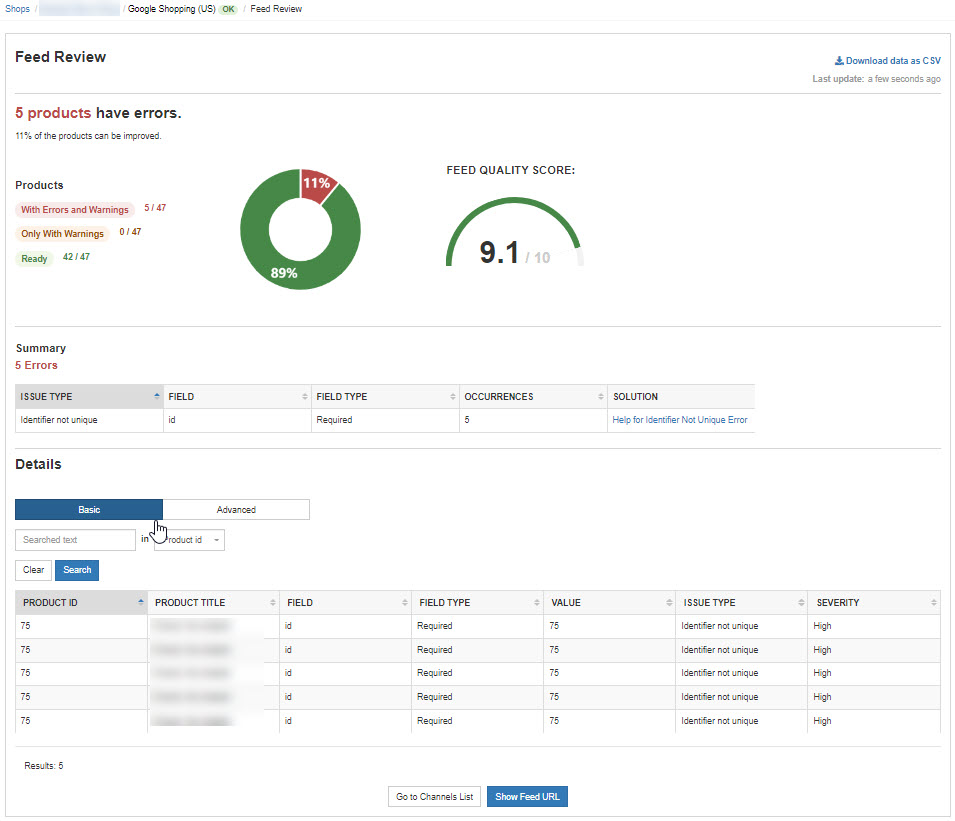
Once you’ve finished mapping your data feed, we can review it to look for possible incorrectness in your data feed.
After the review, we will show you an insightful yet concise report of the possible errors that the selected channel may throw after sending your feed.
Feed Review lets you:
- Find out your products' errors and what type of errors they are before sending them to the channel.
- It’s a huge time-saver. You won’t have to wait until we send your feed and then come back to fix the errors from the beginning.
💡 Learn more about Feed Review in Using Feed Review.
Step 10: Export Your Products to the Channel
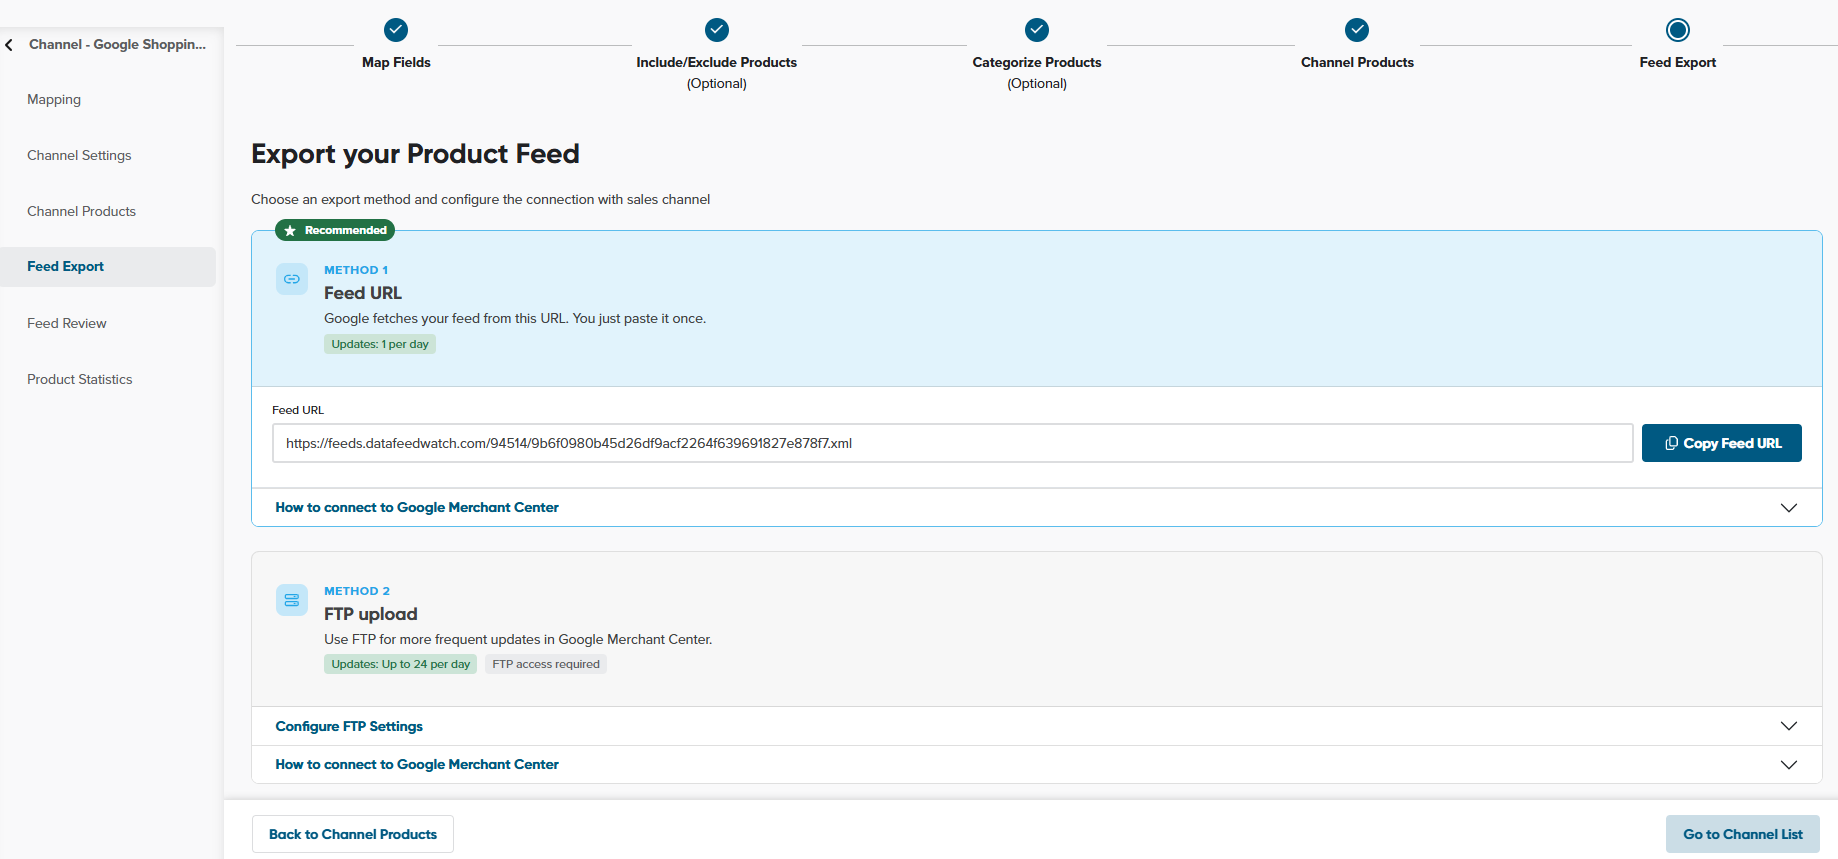
After viewing your products on the Channel Products and Feed Review pages to see how your data will appear on the live channel, look for your unique Feed URL.
💡 What's New: You will now find your export options in a dedicated Feed Export section, where you can choose how to upload your product feed.
Select one of the following three export methods:
- Method 1: Feed URL – Copy your unique, system-generated Feed URL to use on your target channel.
- Method 2: FTP Upload – Enter your secure FTP or SFTP credentials to automatically upload the feed file to your server.
- Method 3: Download Feed File – Directly download the generated product feed file to your local drive.