Our team is always working its magic behind the scenes to continuously improve the app. In this article, we would like to show you step-by-step how to add new shops to your DataFeedWatch account. We made sure to make this process as quick, easy and simple as possible for you.
Let’s see how it works!
We'll take a closer look at the Input Field, Updates Schedule, and Master Fields steps.
Creating a new shop
Let’s go through the whole process together.
 Adding a new shop | DataFeedWatch
Input Feed
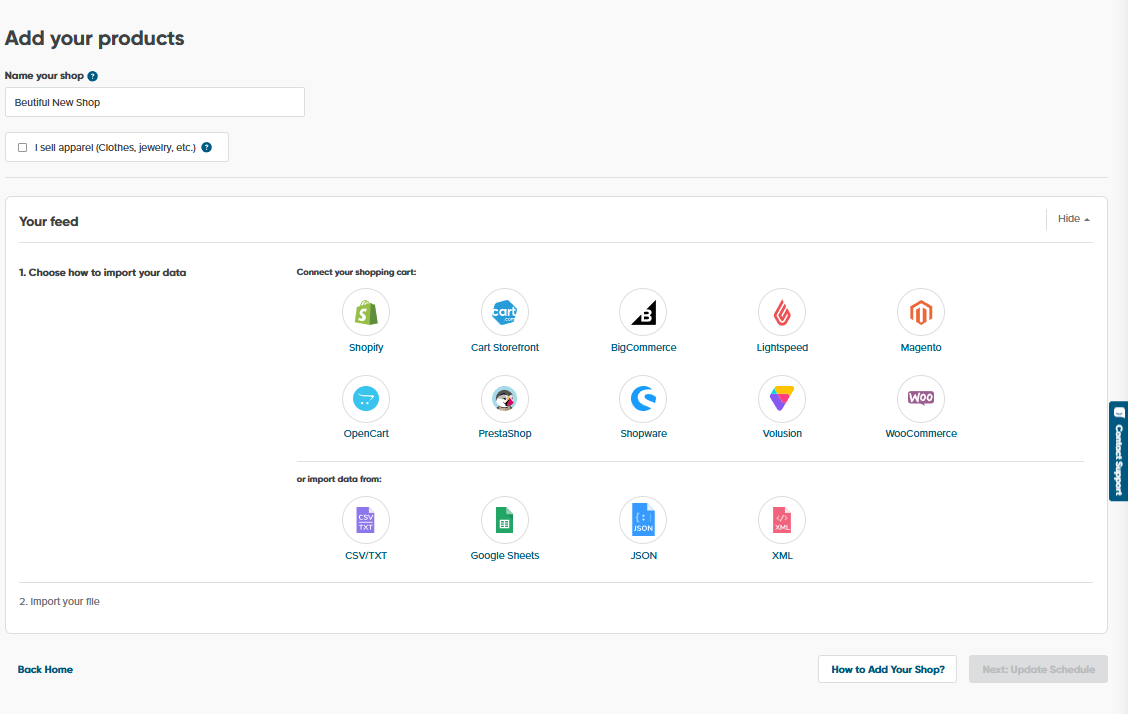
Step 1: Choose a name for your shop.
It can be anything you’d like. Once you type in a name, the main feed input options will appear.
Selling apparel? Tick the box which will help your feed set up later.
Main Feed setup
Step 2: Where is your main feed stored?
This is where you’ll choose the input source of your product data feed. If you’re uploading it from a shopping cart, just choose the corresponding icon.
If your product data is stored in a document instead, you can also simply upload a file. The following are supported file types: .CSV/.TXT, Google Sheets, JSON, or .XML.
Merging more than one file
It’s possible for you to merge more than one document on your own, right where you’re creating your new shop.
You’re also able to merge more than one type of file. The only exception is JSON which can only be merged with another JSON file (for now).
 Uploading a feed file | DataFeedWatch
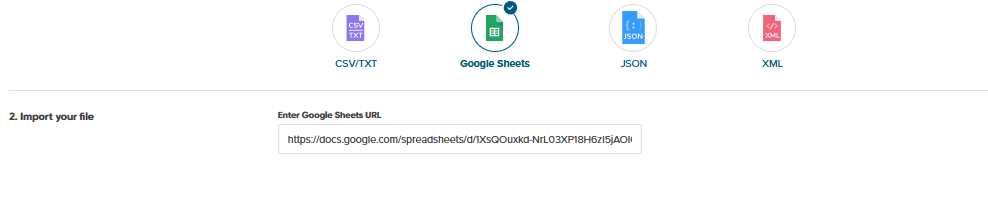
Choose the icon for the type of file you’re using and either browse the file or paste the URL. Then click on + Merge with Another File and follow the same process.

 Uploading an additional feed | DataFeedWatch
After setting up your new shop, you’ll be able to access the Merge File settings for further set up.
Daily update scheduling
It’s recommended to schedule at least one update every day. That way you can assure that your feeds are always fresh and the most recent information is displayed in your ads.
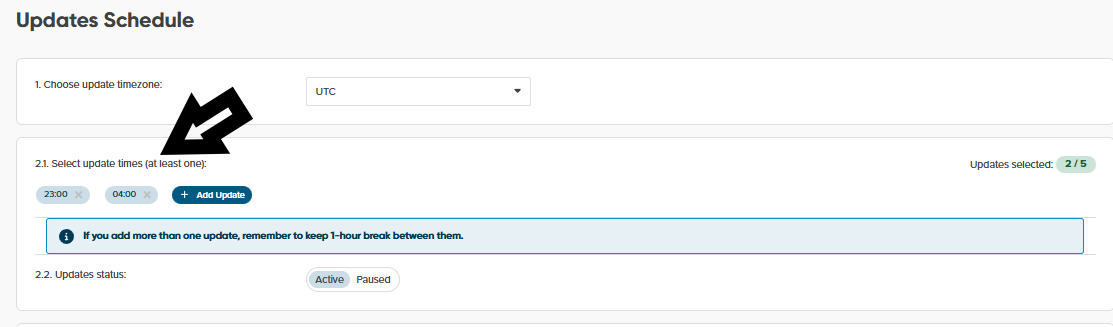
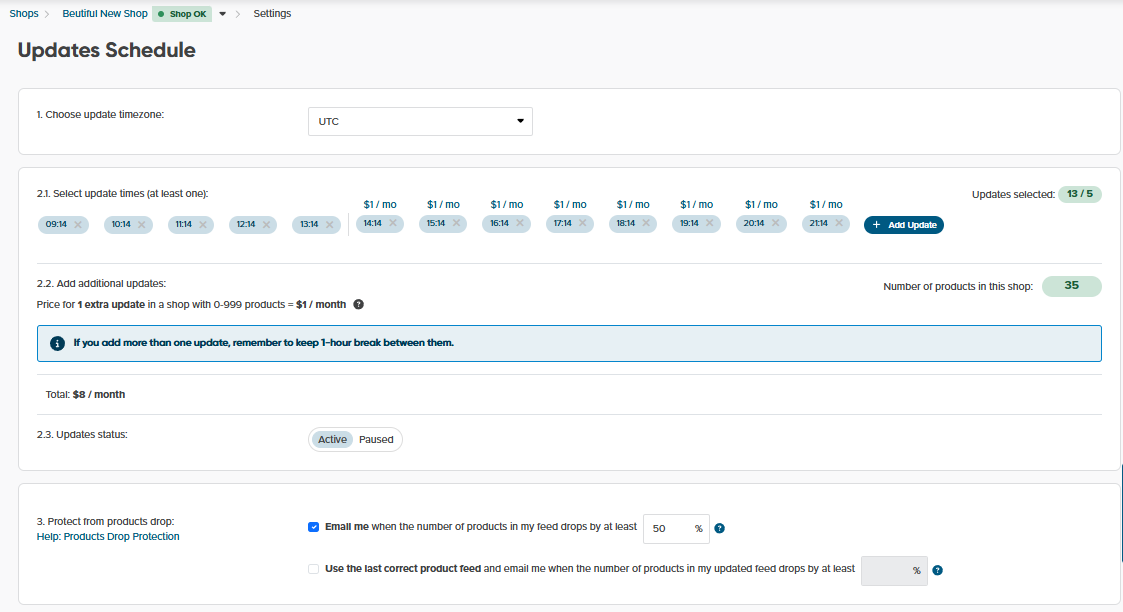
Step 3: Select your desired time zone, and then choose the times you would like your products to be updated.
 Scheduling daily uploads | DataFeedWatch
Click on + Add Another Update and pick the time either by clicking on the numbers or typing them in.
Depending on your plan, you’ll have a certain amount of free daily downloads. Let’s break it down by tier.
Shop: 1 free daily update, without the possibility of increasing. If you’d like to add more, our Support team will be more than happy to chat about what plan would work best for you.
Merchant: 2 free updates per shop
Agency/Enterprise: 5 free updates per shop
 Scheduling daily uploads | DataFeedWatch
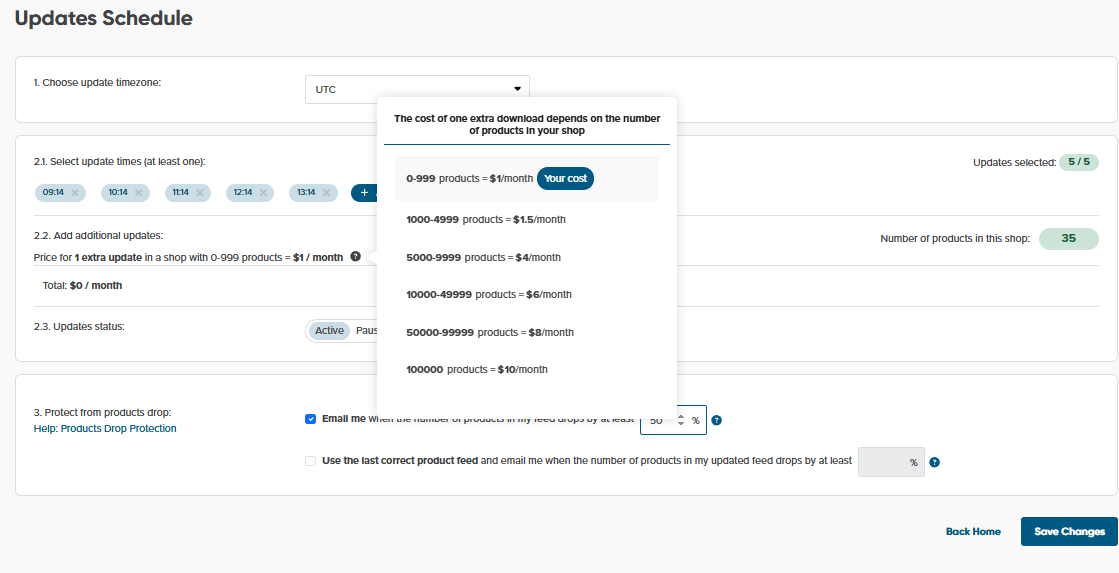
You'll see below that we've chosen more than the available 5 free downloads. In that case, the additional cost will be placed above each download.
 Scheduling daily uploads | DataFeedWatch
Extra update costs are determined by how many products are in your shop. You can hover over the question mark icon to see the thresholds and estimation based on the updates you've chosen is provided at the bottom. It's always possible to make edits to these later in your shop settings.
Keep in mind, there’s a total limit of 24 uploads for every shop.
Final steps
Optional step 4: Merge settings
You can skip this step if you used only one source for your data feeds.
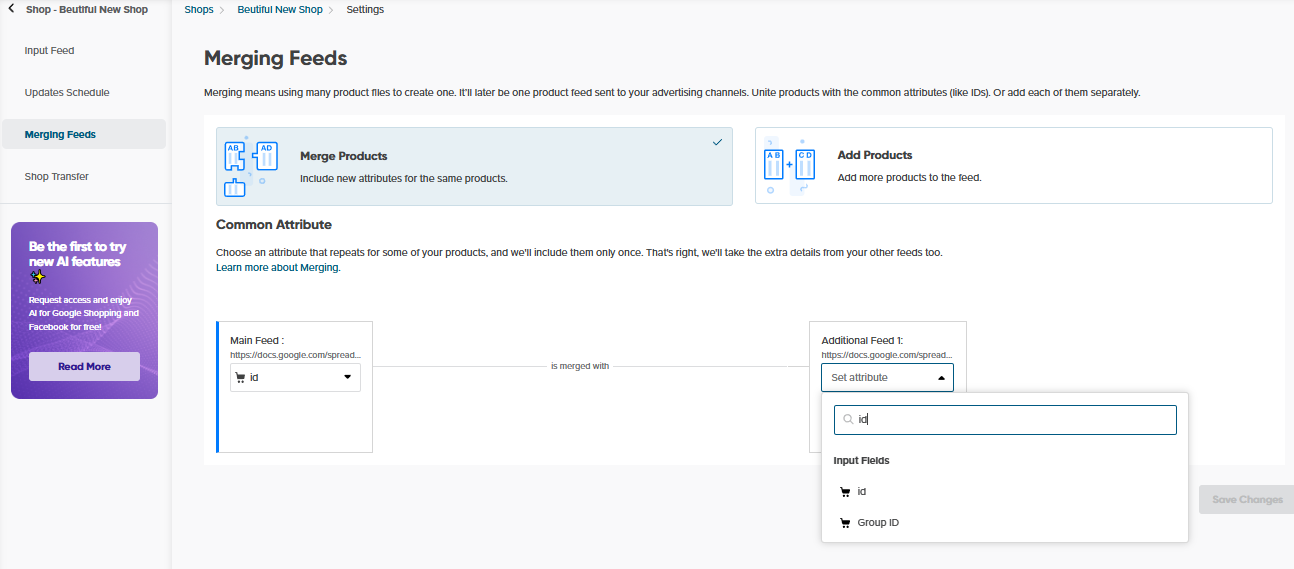
Now that all your products have finished downloading, you can go into your Merge Feed settings. To make sure they’re merged successfully, choose common attributes that are repeating in your feeds so that the data isn’t used more than once.
 Merging two data sources | DataFeedWatch
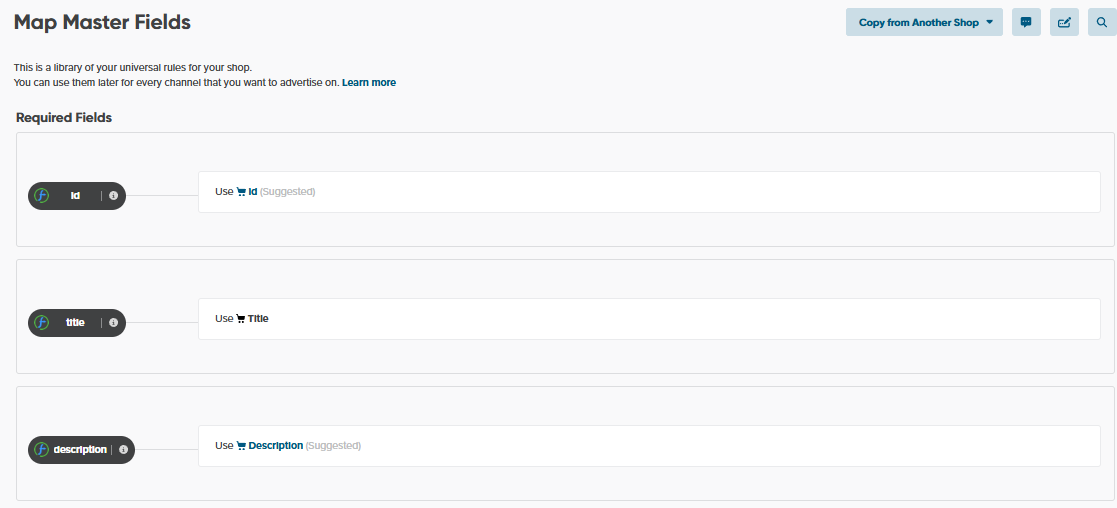
Step 5: Map your Master Fields
We’ve come to the last step. Now you can map your Master Fields. You’ll see our suggestions as well, so you can decide if everything looks good and continue to finish creating your shop and adding channels.
 Mapping the data feed | DataFeedWatch
Interested in giving your feeds a boost? Check out our articles 10 Ways to Optimize Google Shopping Campaigns and Expert Google Shopping Tips.
Tada!
So now you’ve seen the whole process of how to use our DataFeedWatch shop. As always, we appreciate your feedback. Have any additional questions? Our Support team is always happy to hear from you.
Check out our other services, for example Competitor Monitoring Service - Price Watch
DataFeedWatch - adding shop FAQ
- Can I schedule additional updates?
Yes, you can schedule up to 24 uploads for Merchant, Agency, and Enterprise accounts.
- How much will extra updates cost for me?
You’ll be able to get an estimated cost before deciding based on the amount of products you have. Just add the extra updates you want on the Updates Schedule step of the shop wizard (or in your shop settings) and the prices will appear.
- Can I merge multiple feed sources?
Yes! Now merging multiple feed sources is easier than ever before. You’ll be able to do this in the first step of setting up a new shop, or in the Merge Feed settings later on.